
This tutorial introduces a range of free tools, services, and methods that allow you to publish your WordPress website on a super-fast, secure, and cost-free hosting platform — one that not only performs exceptionally well but is also favored by search engines for its speed and reliability.
We’ll assume a few prerequisites in this tutorial, so we won’t go into detail about how to install a local WordPress or register GitHub and Cloudflare accounts. Before proceeding with the tutorial steps, make sure you’ve completed the following:
- If you don’t have a Cloudflare account yet, register one
- Do the same for GitHub — create an account
- Install a local WordPress instance. You can use the popular solution available at localwp.com for Windows, Mac, or Linux. Alternatively, you can set up a LAMP (Linux-Apache-MySQL-PHP) stack on a Raspberry Pi, or choose a free web hosting tier — here are some options.
High-level overview of the process
Before we go step-by-step, let’s look at the big picture. We’ll host our website on Cloudflare Pages and make it accessible online. This service is free but only supports static hosting. That means we can’t host dynamic websites like WordPress (which requires a web server, PHP, and a MySQL database). So what can we host here? Static content such as HTML, CSS, JavaScript, and images.
So, we’ll create our content, articles, and blog posts locally in WordPress, then convert them into static resources, and finally use automation via GitHub to deploy them to Cloudflare Pages — where visitors will access them securely and quickly, all at zero cost to you.
Why do we need GitHub as an intermediary step?
You can upload content to Cloudflare Pages in two ways. One is manual ZIP upload, and the other is by integrating your GitHub and Cloudflare accounts. In the latter case, whenever you push content to a specific GitHub repository, it automatically gets deployed to Cloudflare Pages.
This tutorial assumes that you already have a working WordPress installation, with all settings configured, content written, and design finalized — in other words, your site is ready for publication.
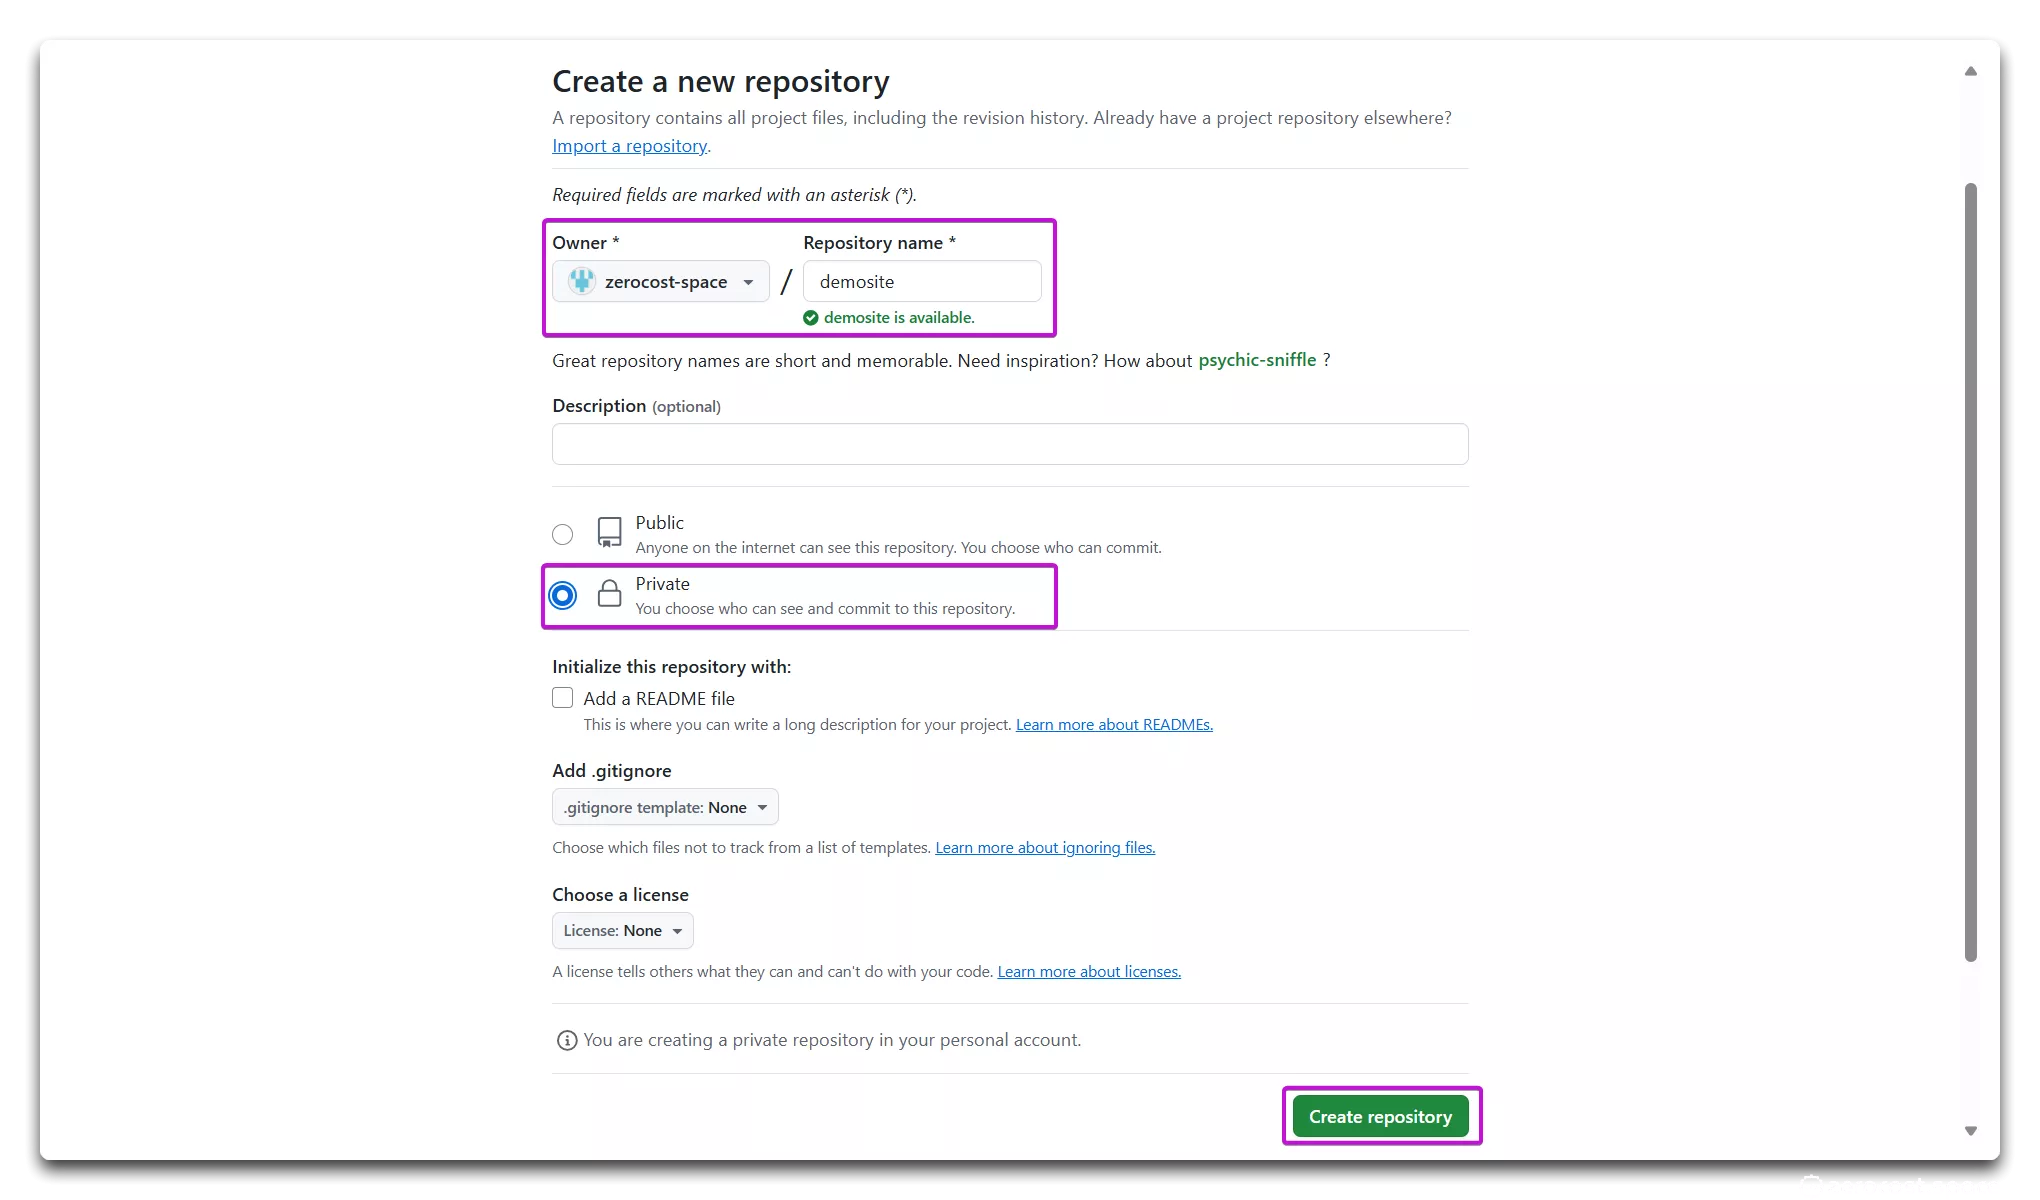
Create a GitHub repository
Create a repository for your website. All updates will automatically sync from this repository to Cloudflare Pages. In this tutorial, we’ll use a private repository, but feel free to use a public one if that suits you better.
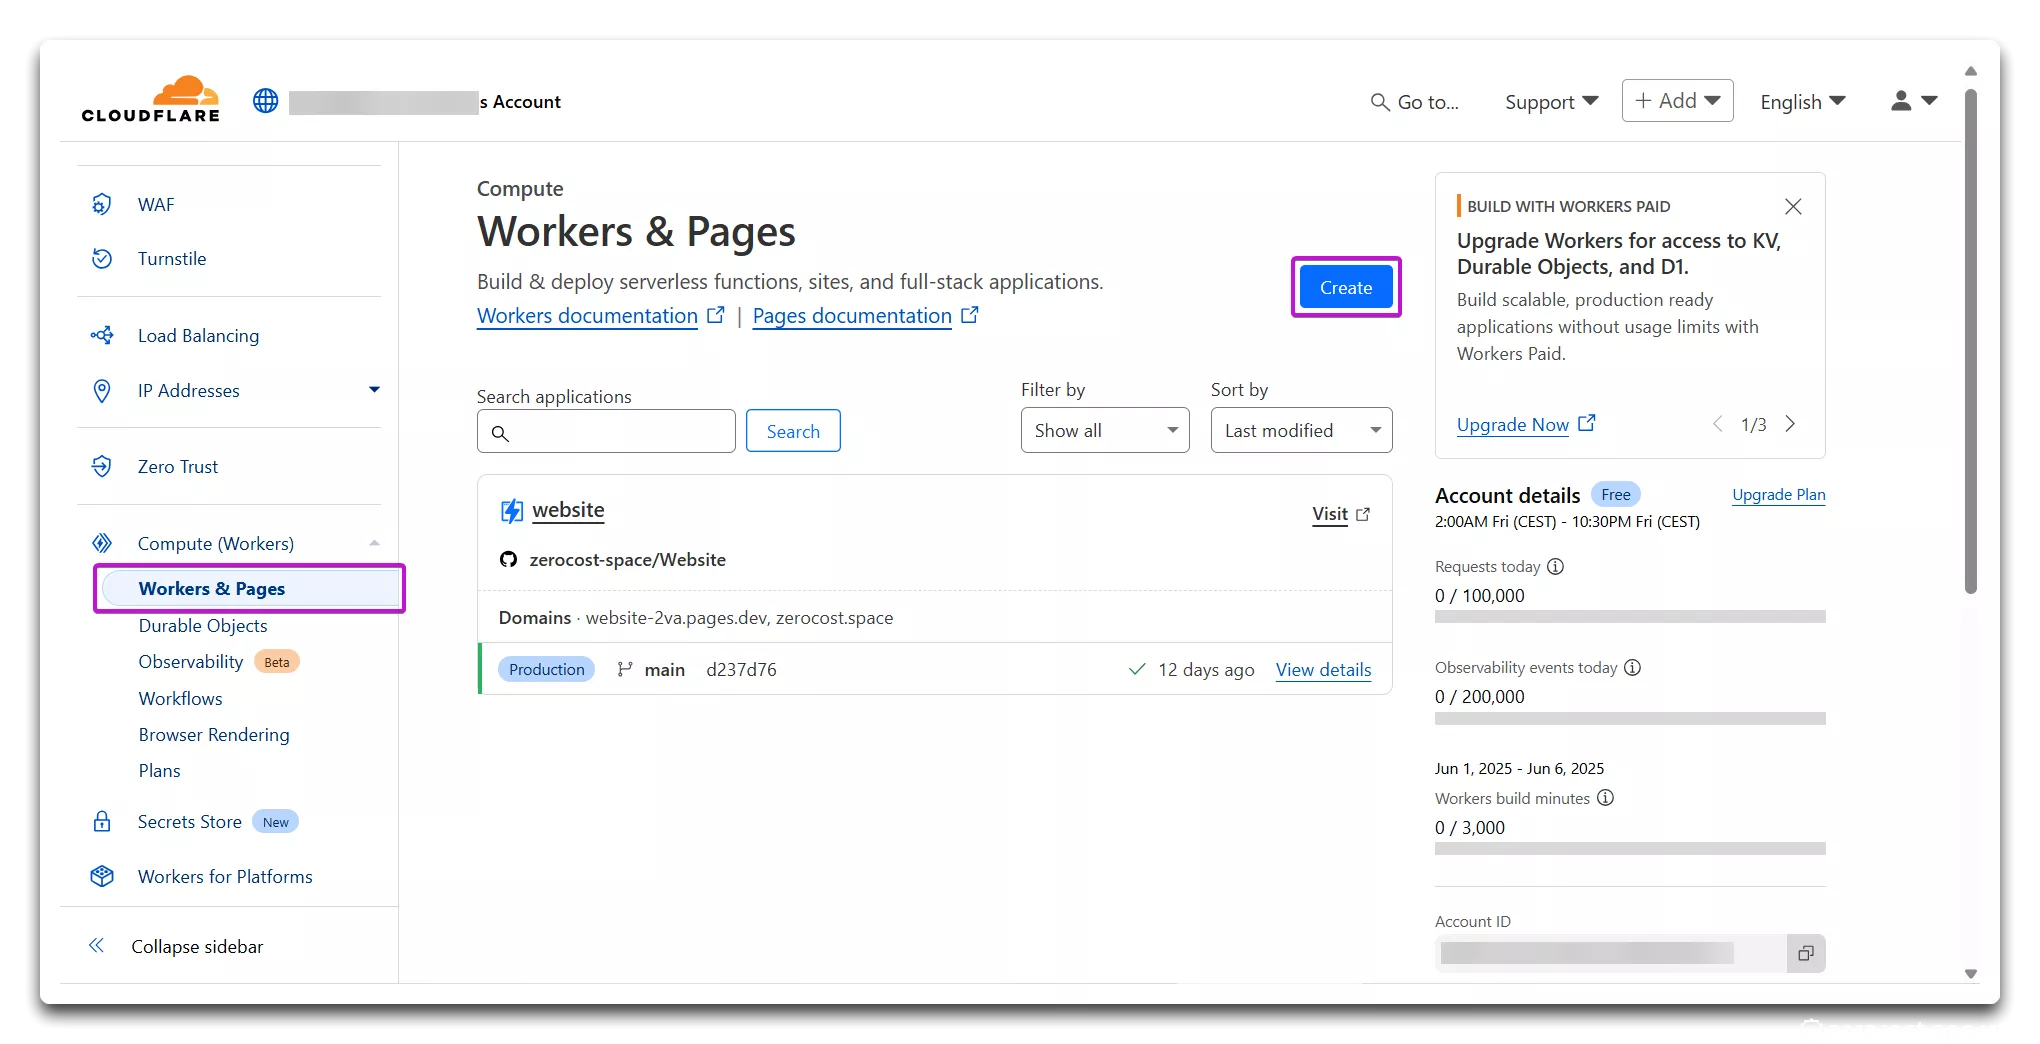
Set up Cloudflare Pages and link it to GitHub
Log in to your Cloudflare account and go to the menu on the left. Choose “Compute (Workers)/Workers & Pages”, then click the “Create” button.
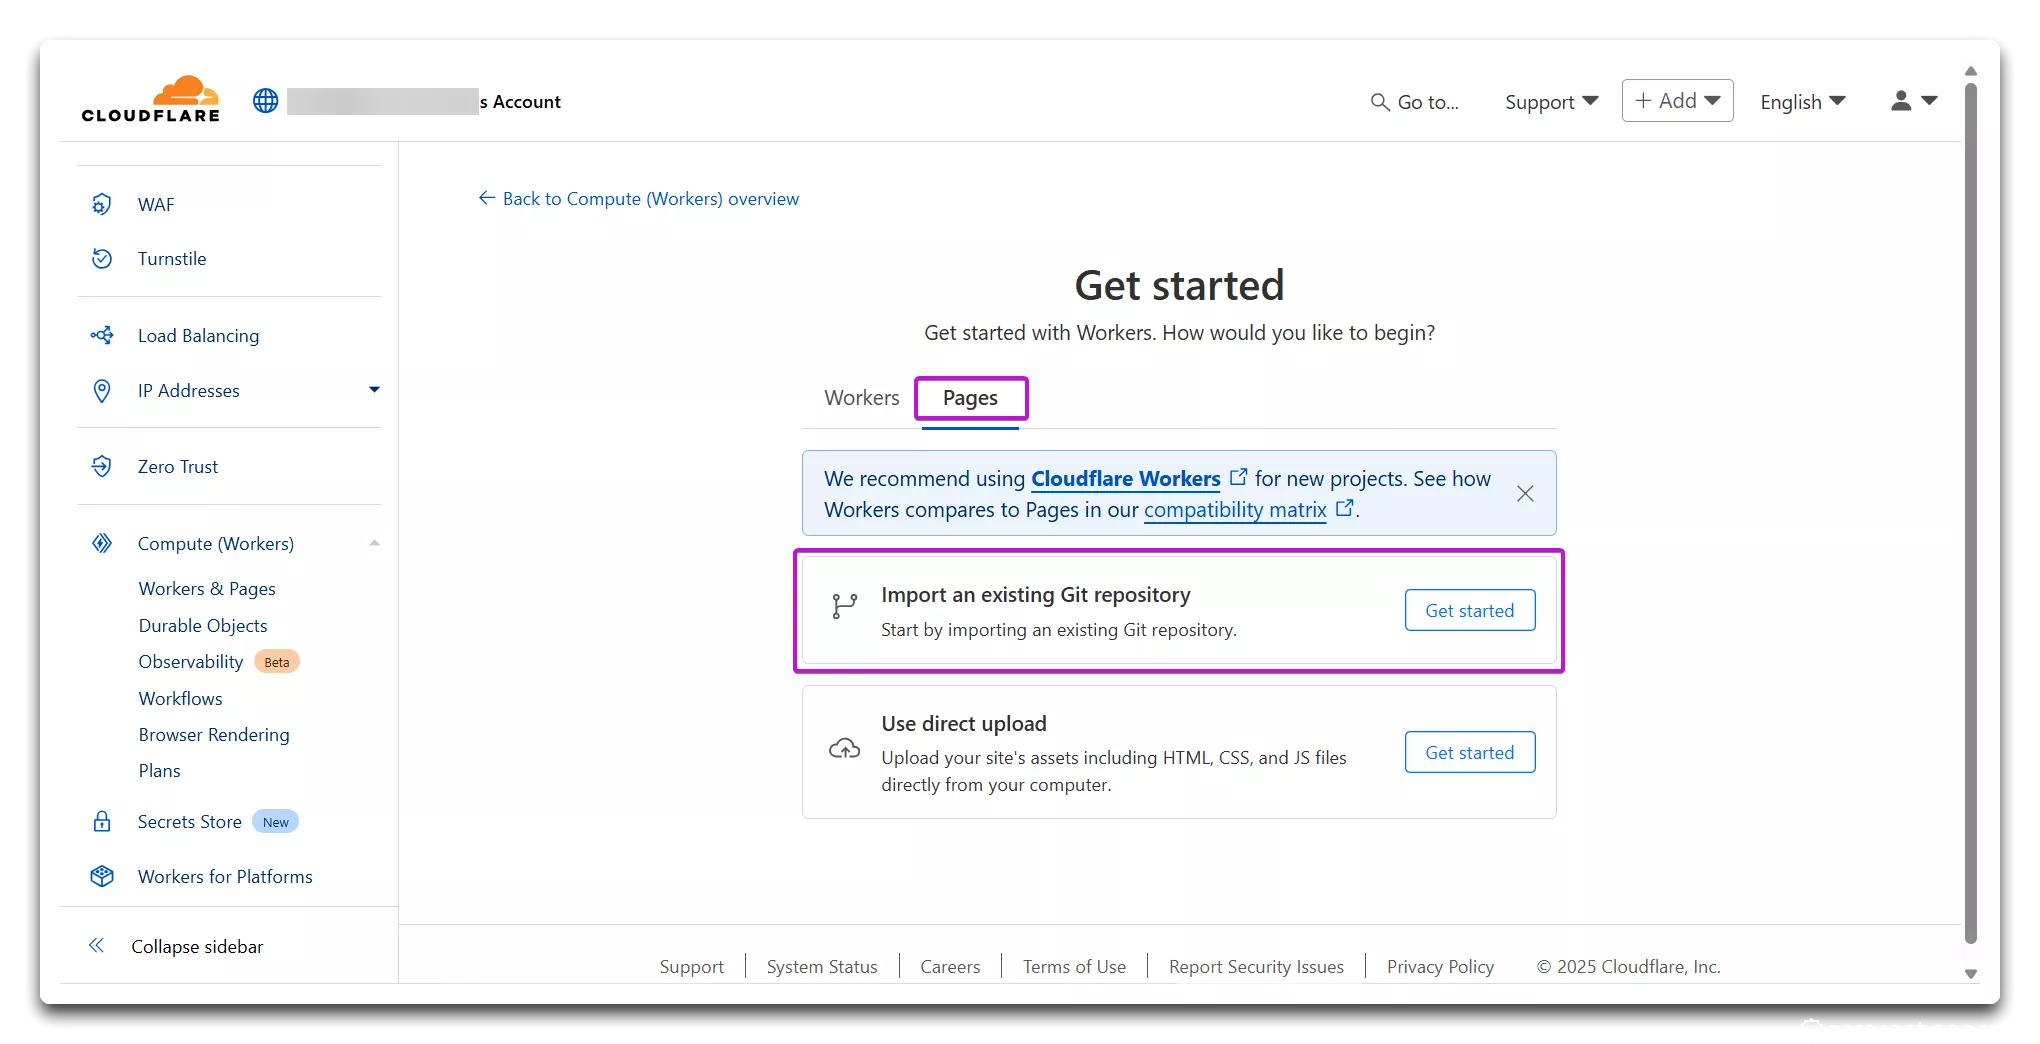
On the next screen, select the “Pages” tab and choose the “Import an existing Git repository” option.
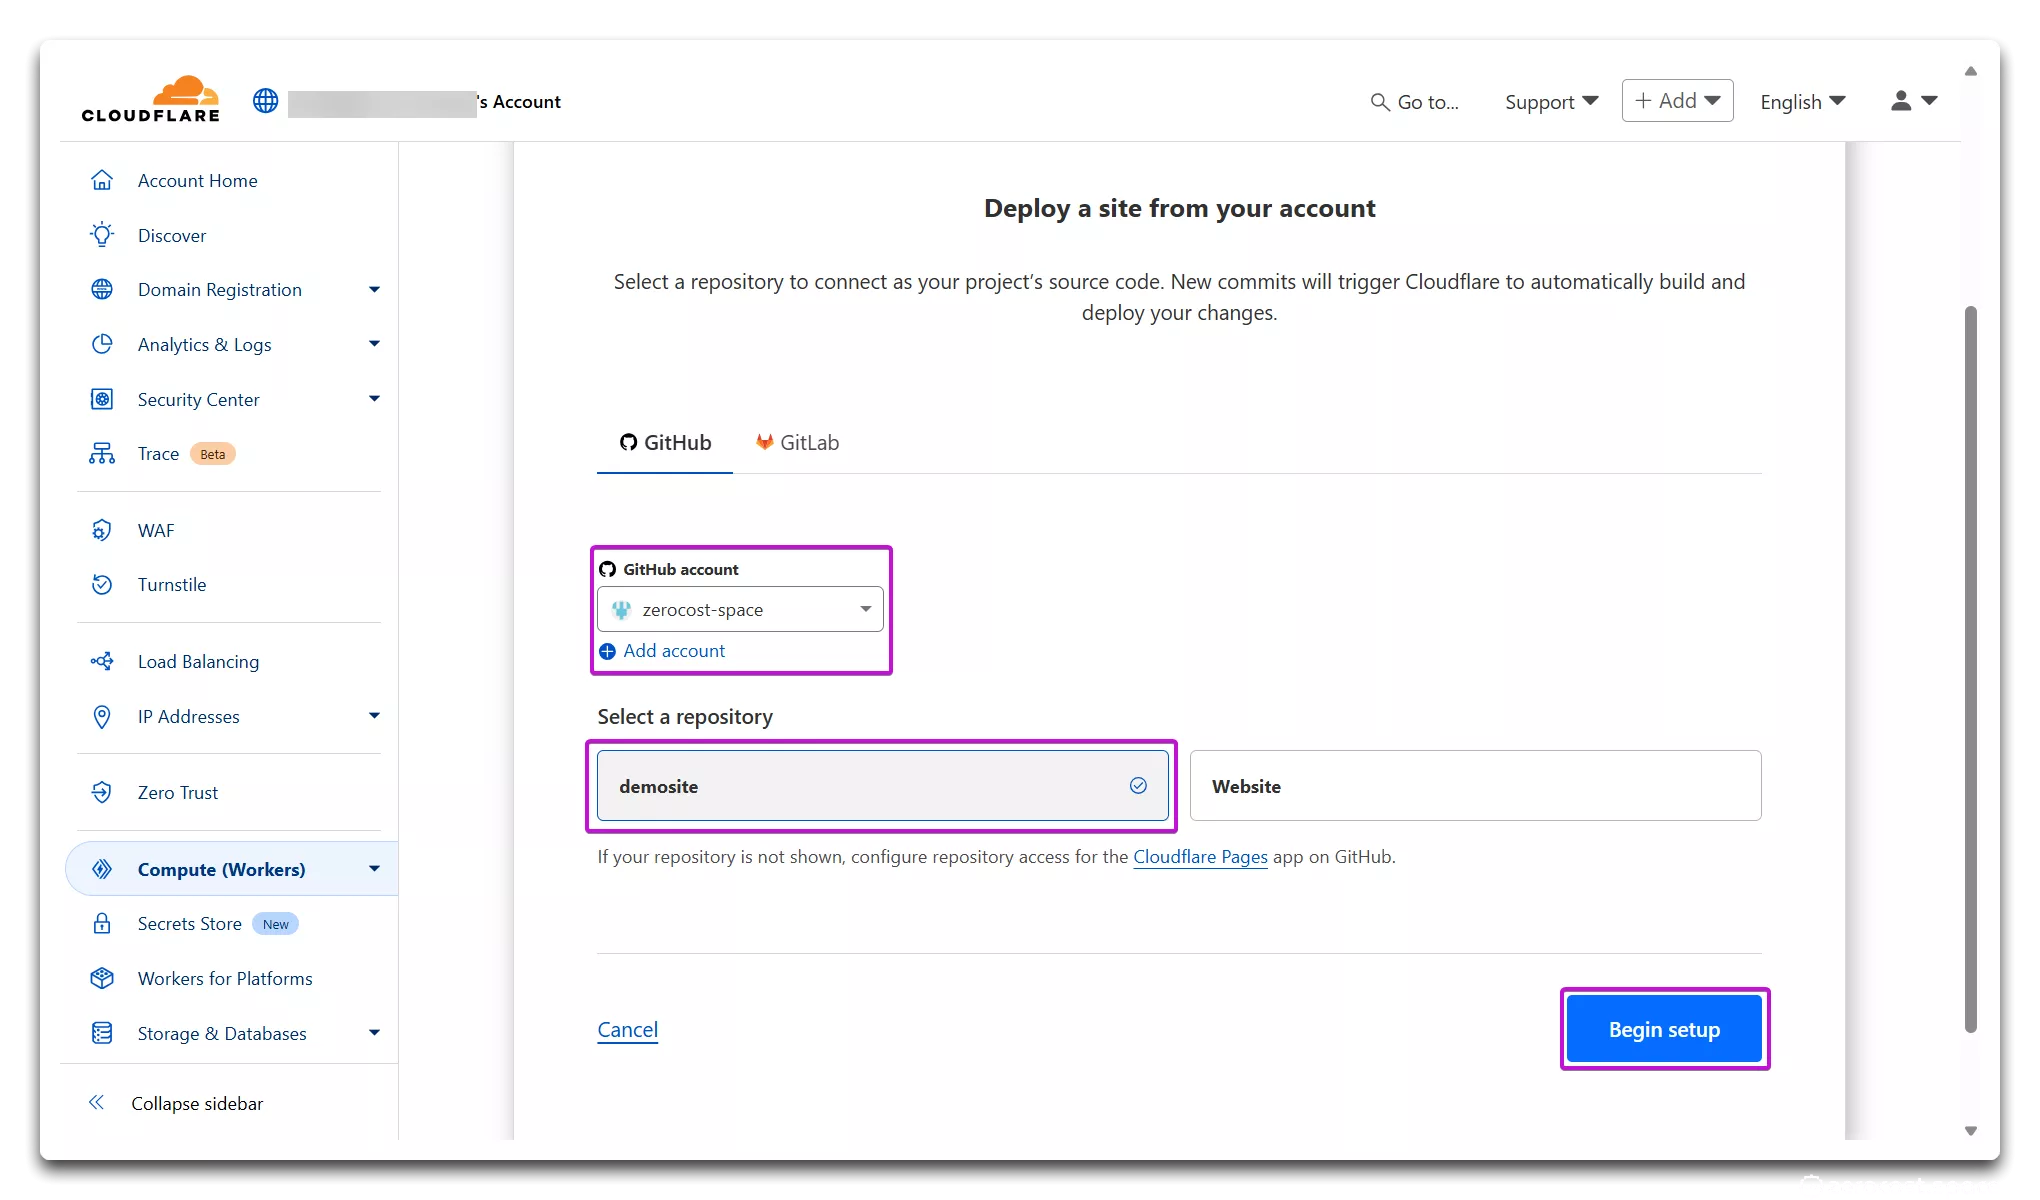
Follow the instructions to link your Cloudflare and GitHub accounts. Once done, select which repository should sync with Cloudflare.
Requesting a GitHub API key
In this step, generate a GitHub API token. This is necessary for automatically committing and pushing static site content to GitHub.
In GitHub, go to “Settings/Developer Settings/Personal Access Tokens/Fine-grained tokens” and click “Generate New Token”.
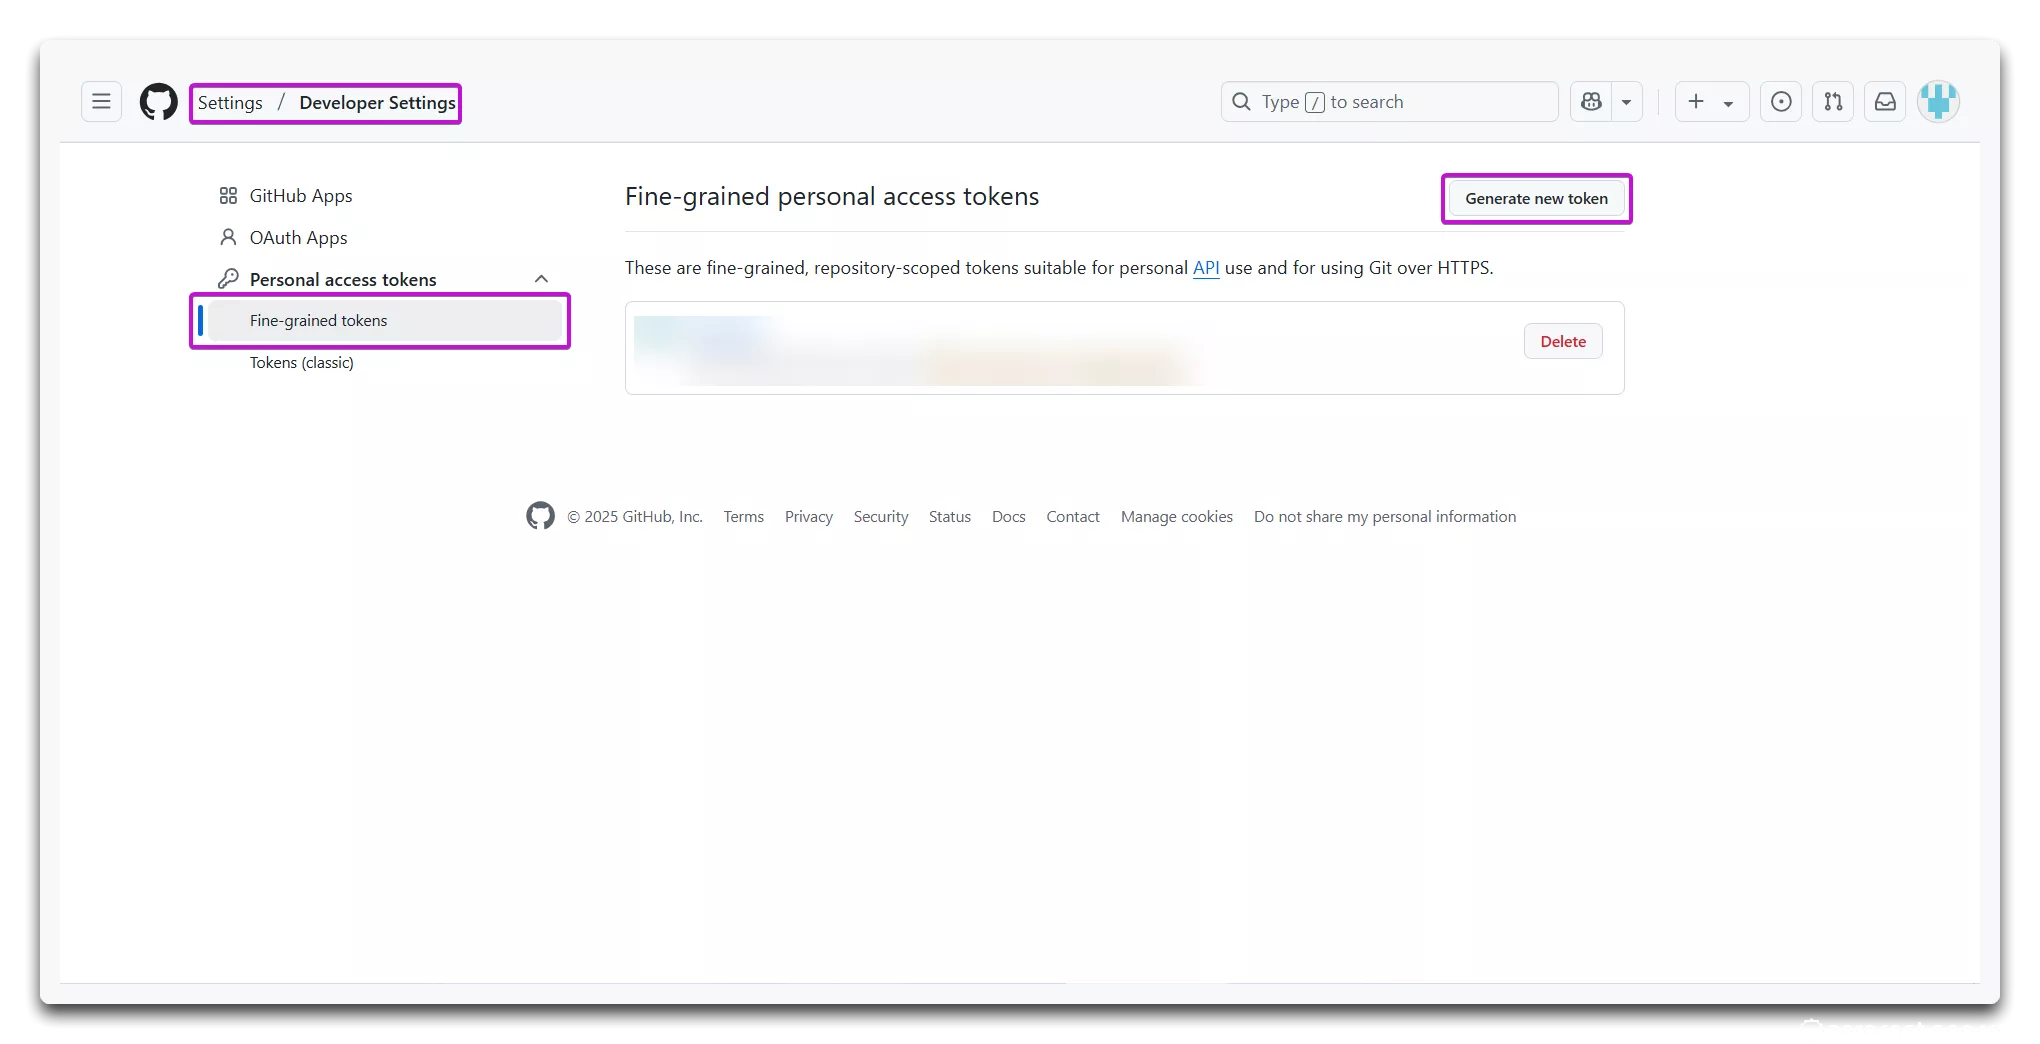
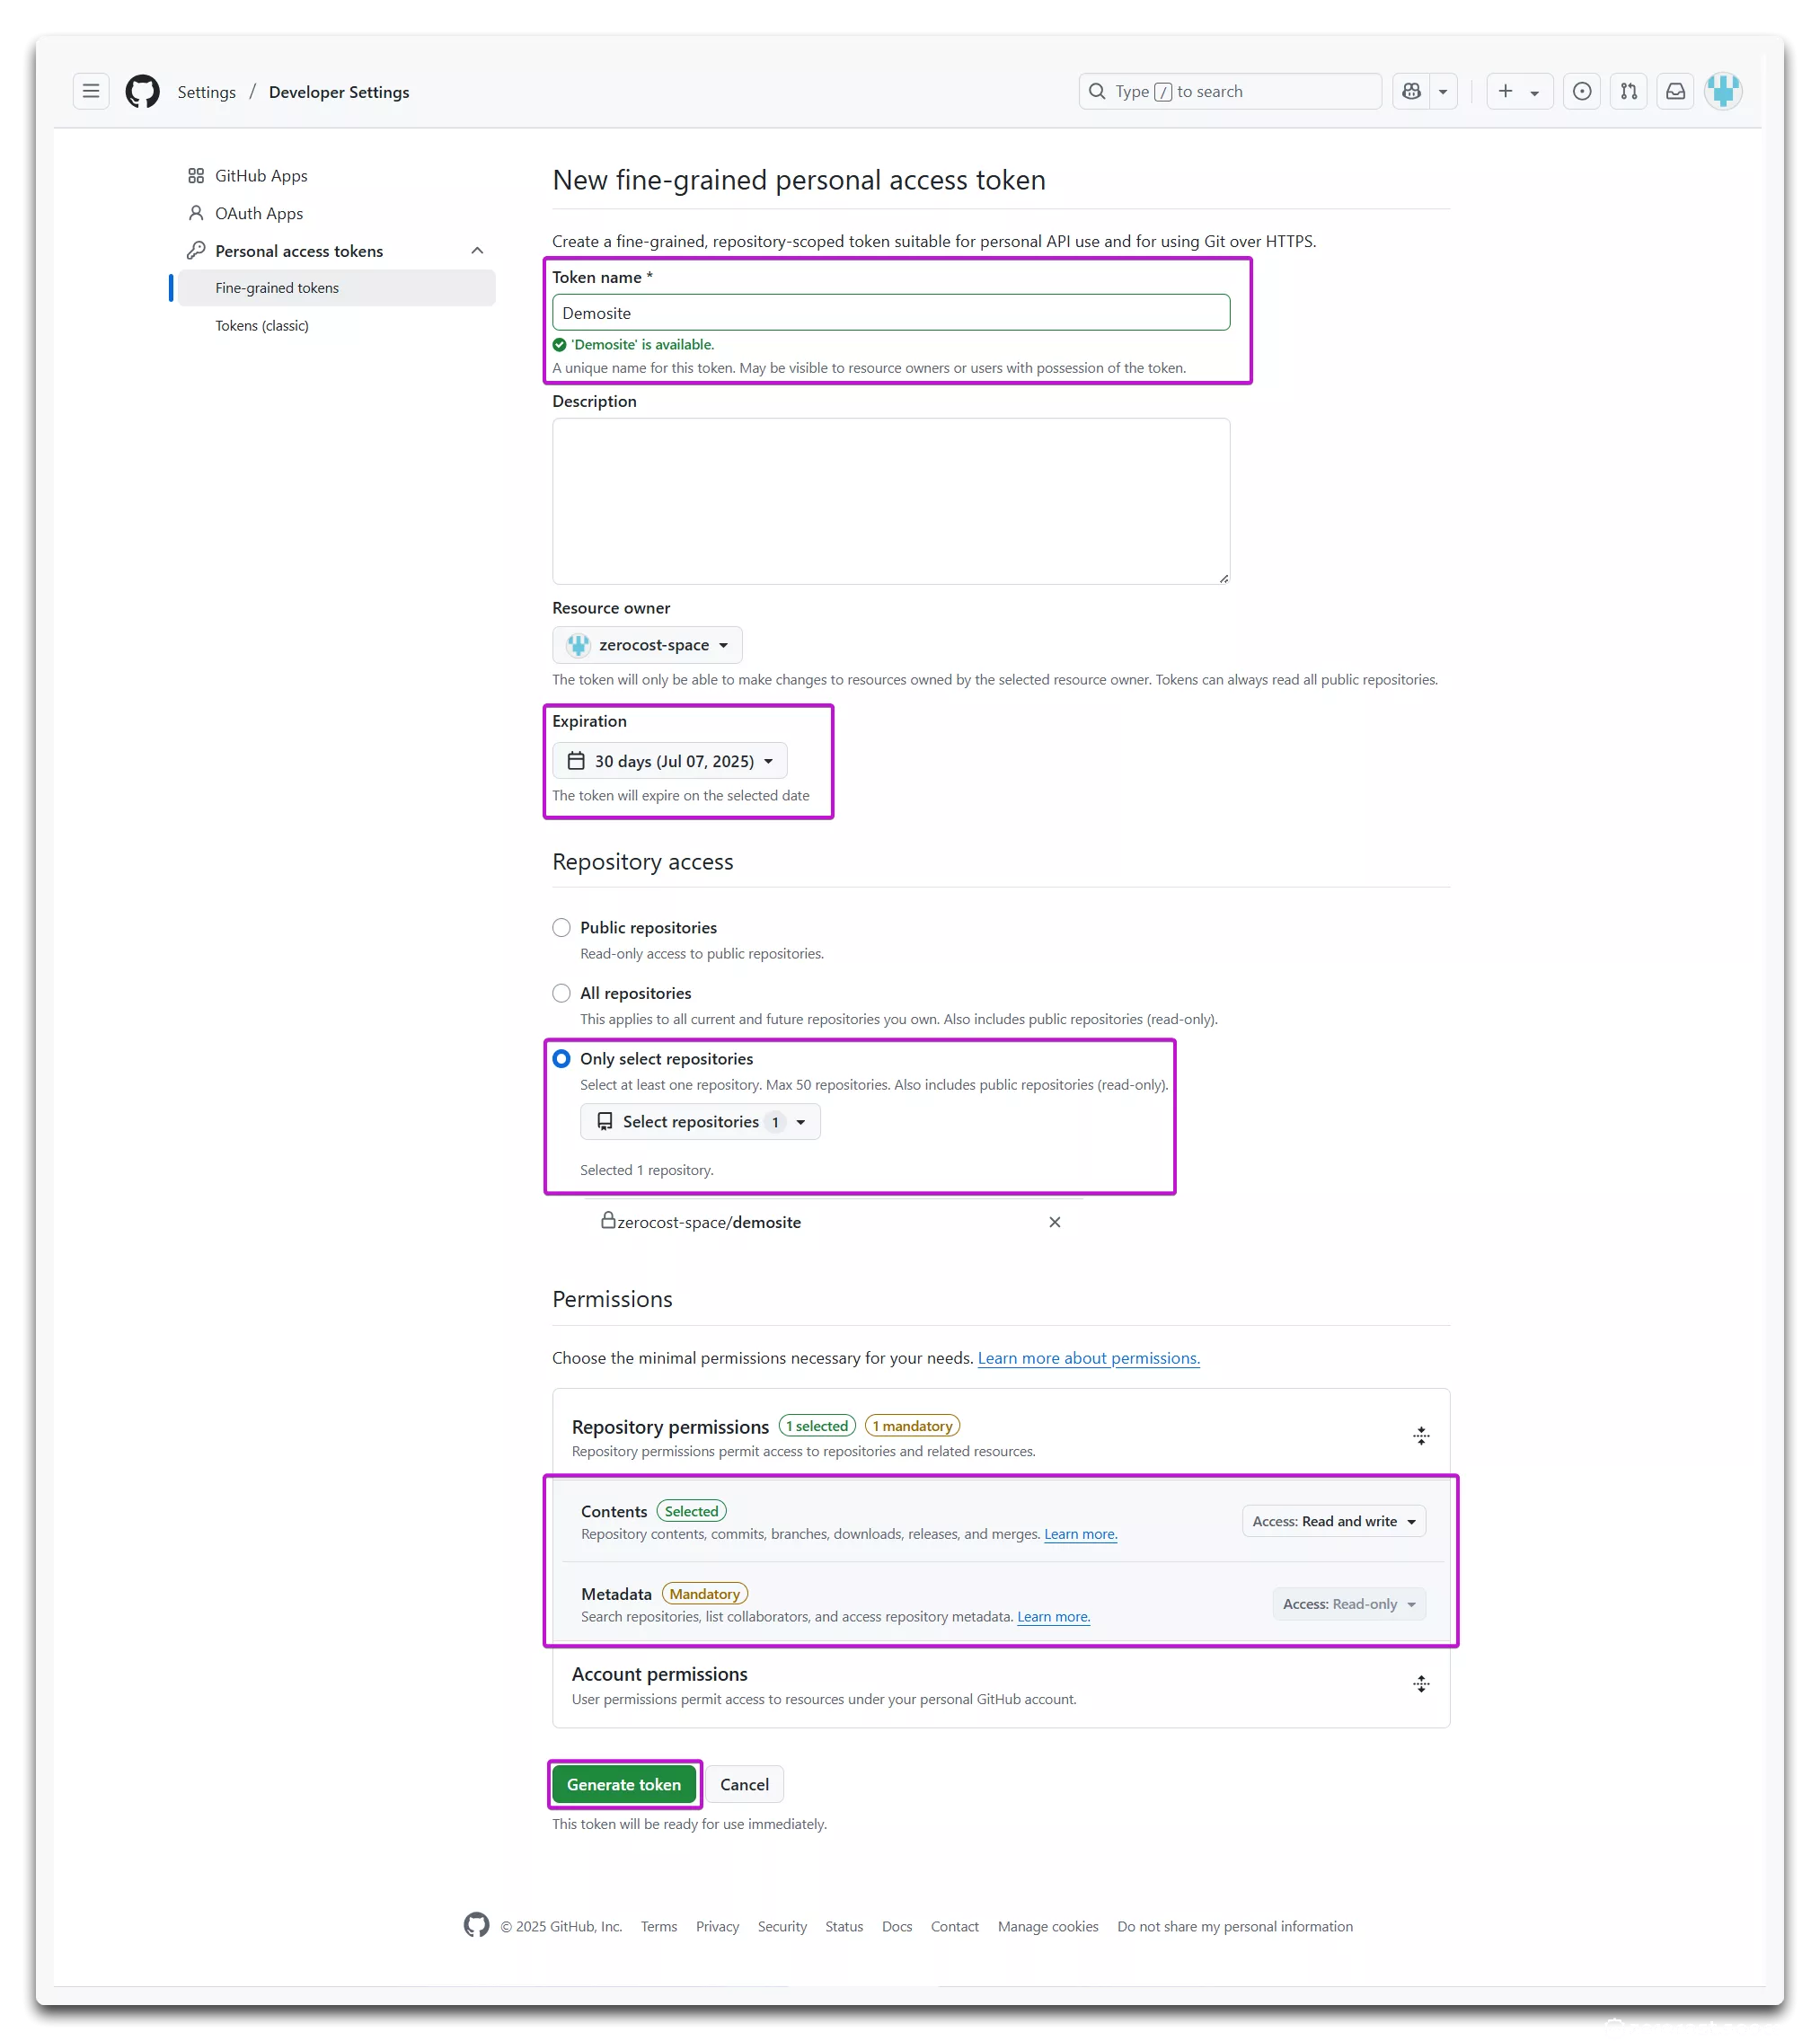
On the “New fine-grained token setup” screen, name the token, set an expiration date, associate it with your repository, and set the following permissions:
- Contents: “Read and Write”
- Metadata: “Read only”
Once done, click “Generate Token”. We’ll use this token in the next step.
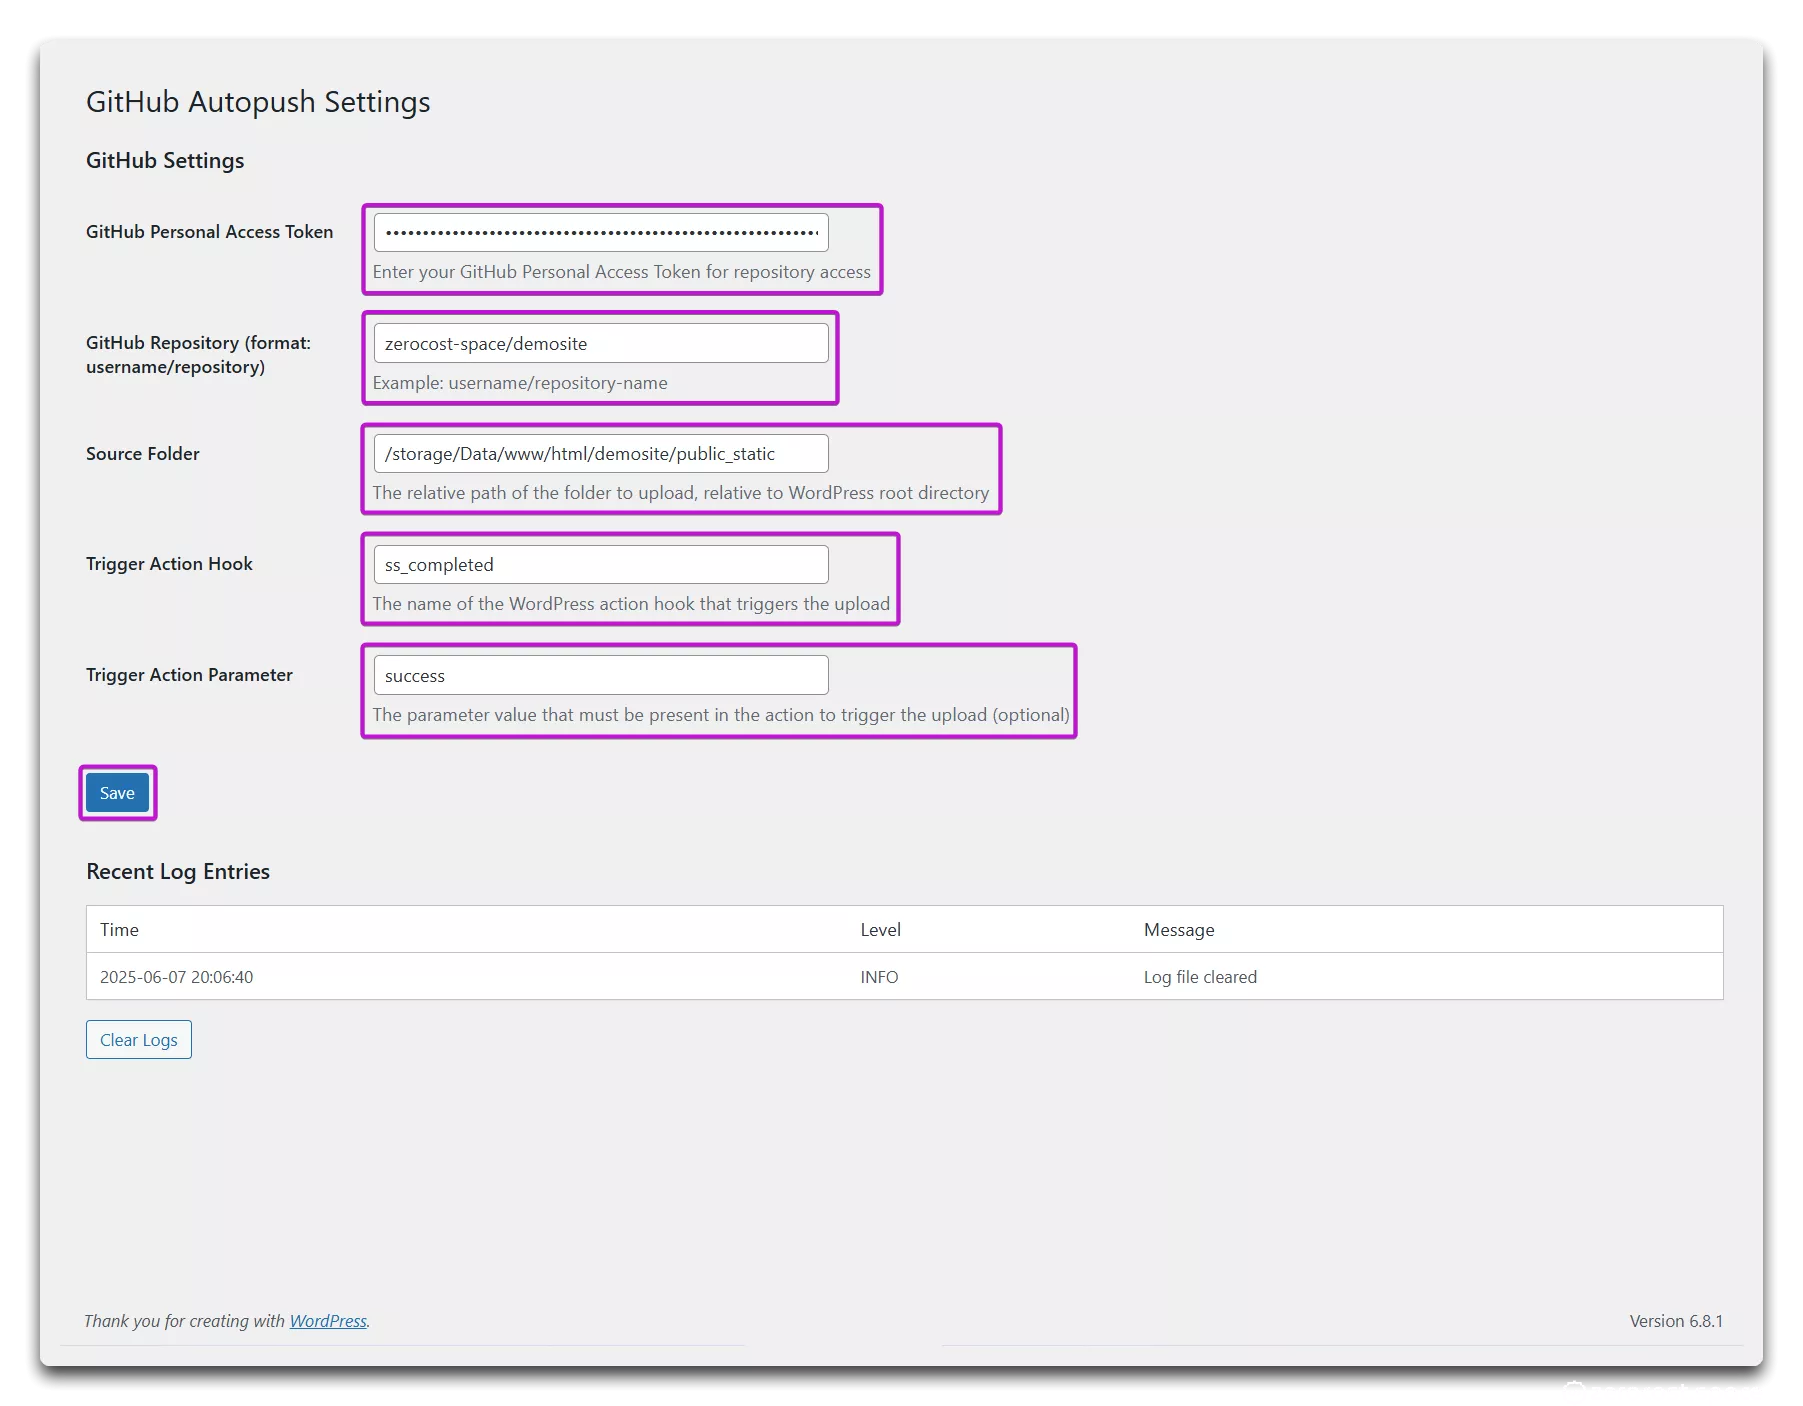
Install and configure the GitHub Autopush plugin
In this step, install the GitHub Autopush plugin in your local WordPress site. This plugin will take the static site content generated by Simply Static and commit/push it to your GitHub repository.
Download the plugin from GitHub and install it. After installation, go to “Settings/GitHub Autopush”.
Fill in the fields and save the settings:
- GitHub Personal Access Token: Use the one you created earlier
- GitHub Repository: The one we created earlier
- Source Folder: Create a directory for the generated static content and specify its path. Adjust permissions based on your OS.
- Trigger Action Hook: Must be exactly “ss_completed”
- Trigger Action Parameter: Must be exactly “success”
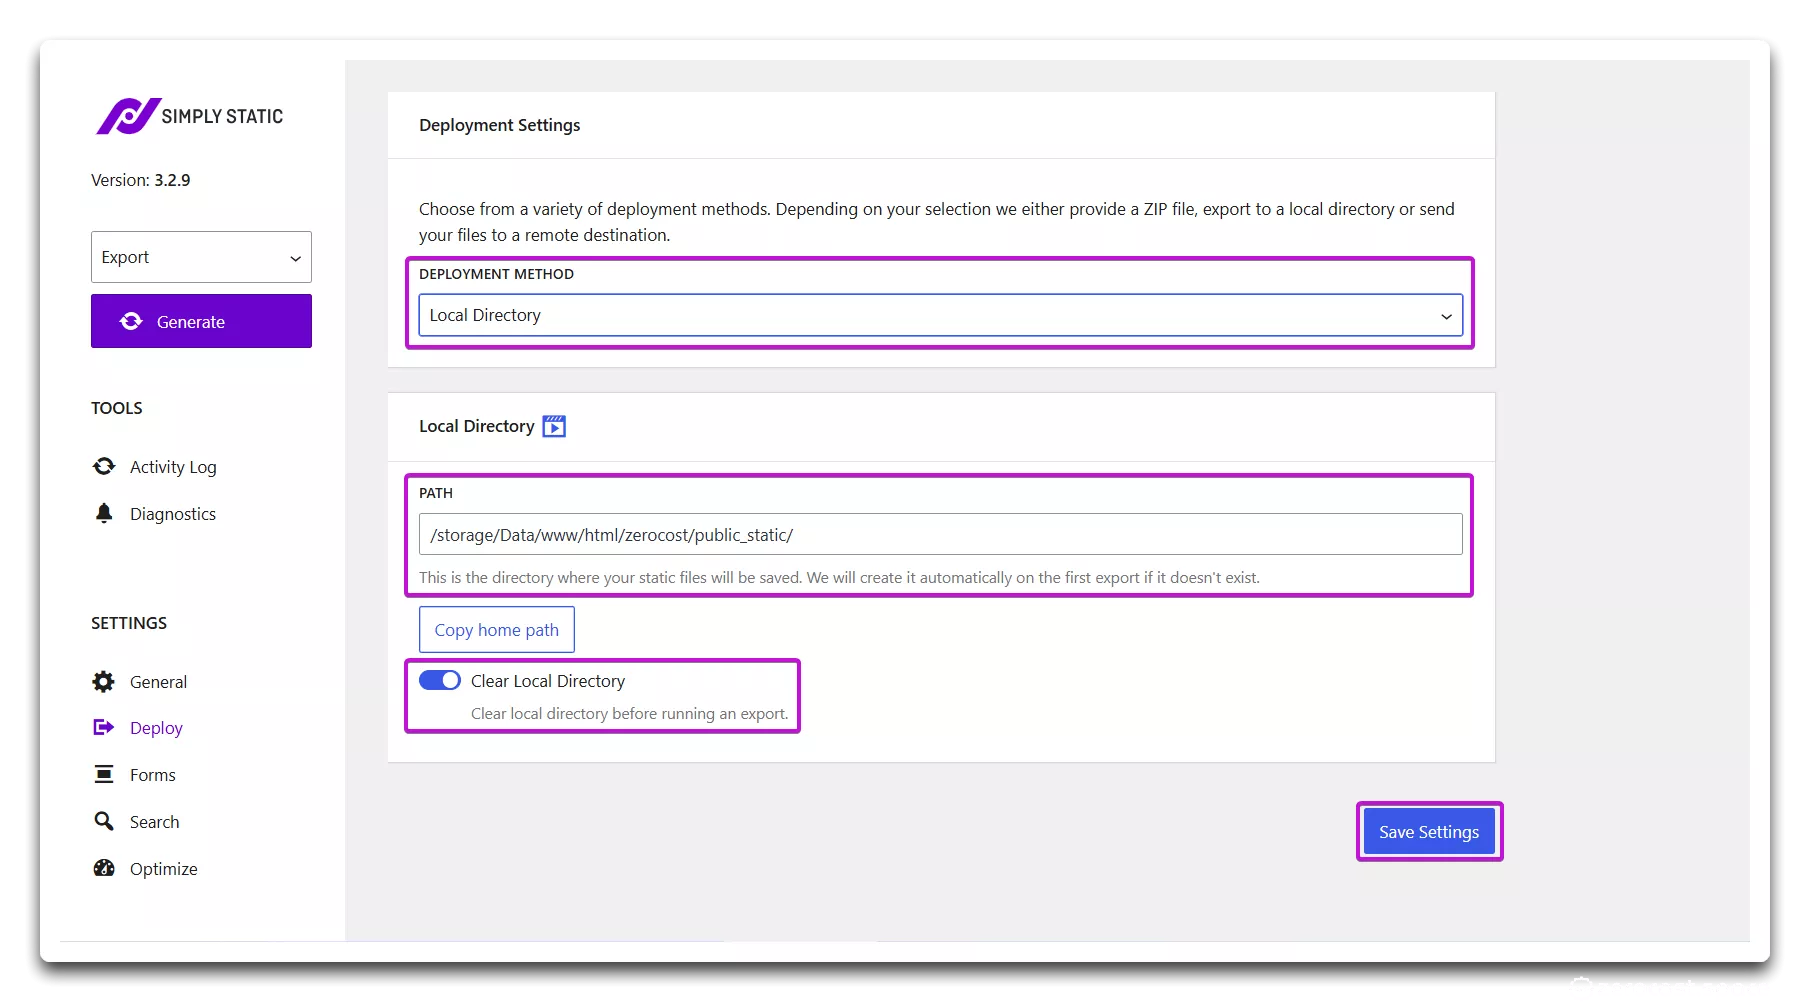
Exporting static content with Simply Static
We’ll use the Simply Static plugin to generate the static version of the site. Install it on the WordPress admin under Plugins.
We’ll use the free version of Simply Static in the spirit of “zero cost.” The paid version includes additional features and even supports direct GitHub uploads, which could automate Cloudflare deployment as well. But for now, we’re focusing on free solutions, which is why we installed the GitHub Autopush Plugin earlier.
Set the following parameters in Simply Static’s “Deploy” menu:
- Deployment Method: “Local Directory”
- Path: Use the same directory you specified earlier
- Clear Local Directory: Optional — if enabled, generation always starts with a clean slate
Start generation and test the pipeline
In the final step, click the “Generate” button in Simply Static. The export process will begin and you can monitor it via logs. Once complete, the “ss_completed” action hook will trigger the GitHub Autopush plugin to commit and upload the files — you’ll also get a status message in the plugin’s interface. If all goes well, your GitHub repository will be updated and Cloudflare Pages will automatically deploy the site to the assigned URL. Try it — open the page!
Next steps
What to do next? Check out these tutorials:
- Link your own domain to your Cloudflare Pages site
- Add search functionality to your static website
- Enable commenting on your static posts